How to Create Deliveries to Invoice?
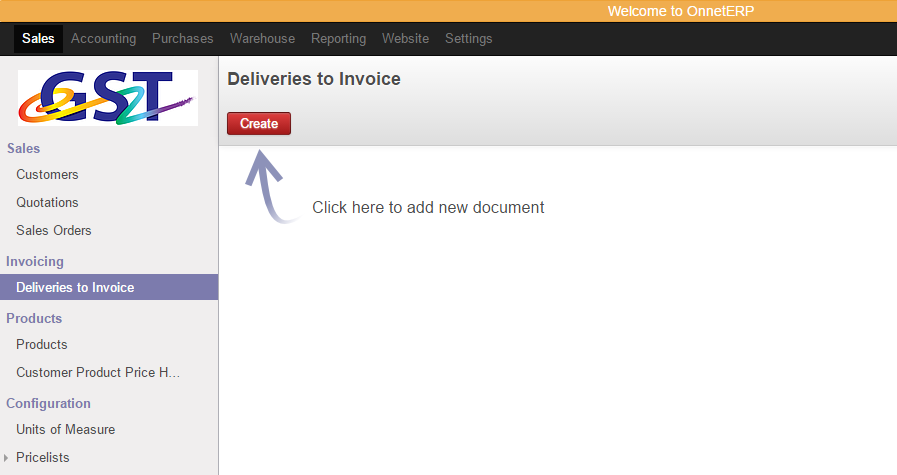
Step 1
-
Click the "Sales" on menu.
-
Go to "Invoicing" and select "Deliveries To Invoice" on the submenu.
-
Click
by and start to add new document.
Step 2
-
Select
and choose your partner.
-
Creation Date - Usually the time of the order.
-
Scheduled Date - Expected date for all the stock moves.
-
-
Next, select
.

Step 3
-
Select your product in the
-
Fill in the quantity that customer needed and select the units( kg, g, cm, foot and etc).
-
Date : Moving date - Scheduled date ultil move is done, then date of actual move processing.
-
Expected Date - Default is same as Schedule Date (unless specify).
-
Invoice Control:
-
Invoiced - Draft Invoice is automatically created at background
-
To Be Invoiced - An Invoice is waiting to be created
-
Not Applicable - No Invoice will be created
-
-
Locations: (default Location as below)
-
Source Location - WareHouse / Stock
-
Destination Location - Partner Locations / Customers
-
-
When everything is complete, select
, or select
to continue add new product, else click
to cancel edit.
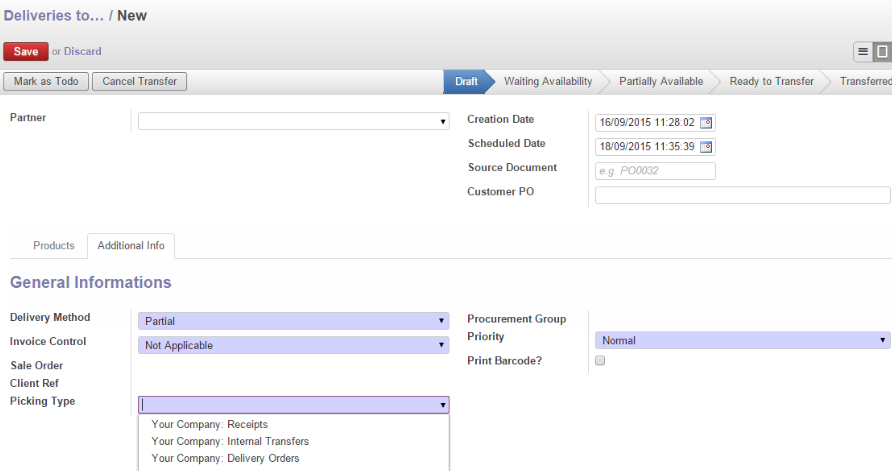
Step 4
-
Select "Additonal Info" shown below.
-
Picking Type
-
Receipts – Do not select as this is mainly for receiving goods (PO)
-
Internal Transfers – This is mainly for internal company stock moves
-
Delivery Order – This should be Default for all DO creation.
-
-
Once you done and click
.
-
Next, Click on Mark as TODO
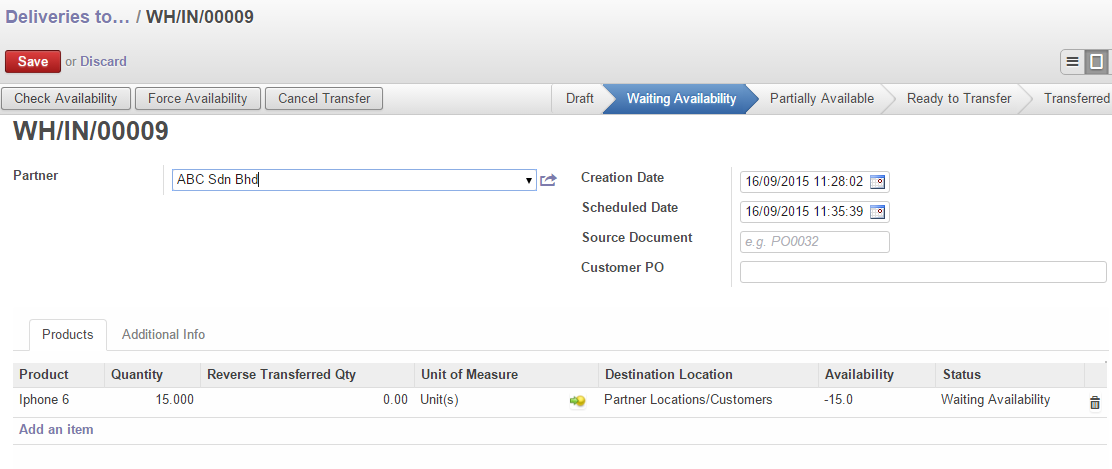
Step 5
-
"Waiting Availability" will be shown under the status
.
-
Then, continue click on
.
-
Available - Product is available at stock.
-
Waiting Available - You can Force Available if you need to transfer.
-
Next, Click on “Transfer”.
- Then, Click “OK”. If you need to separate to multiple DO then follow standard DO flow.