How to Create New Product ?
Step 1
-
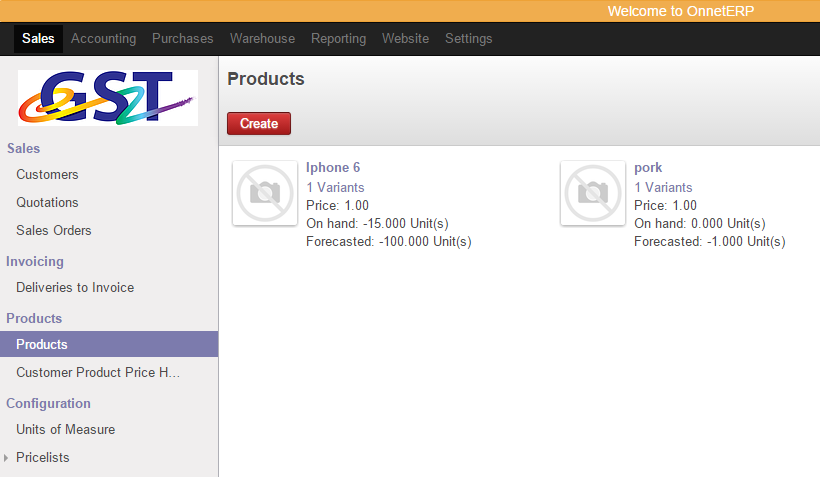
Click "Sales" on menu.
-
Select "Products" on the submenu.
-
Click
to add new document.
Step 2
-
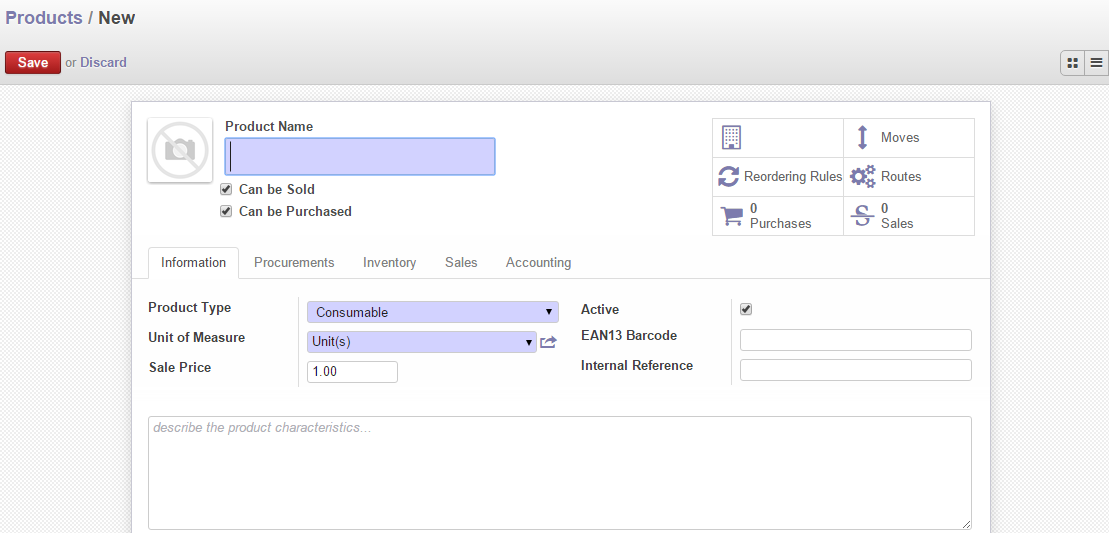
Fill in “Product Name”.
-
“Can Be Sold” Or “Can Be Purchased”
-
If product only can be sold – Sales only (*This product will appear in Customer Invoice list).
-
If product only can be Purchased – Purchases only (This product will appear in Supplier Invoice list).
-
If product can be sold and purchased (Default) – Check for both (This product will appear in both Customer and Supplier list).
-
-
Under Information Tab
-
Product Type: 3 different settings
-
#1 Stockable Product – This is mainly use on Stock control stock (if you need to have proper stock in/out).
-
#2 Consumable - This is mainly use on non-stock control product (if you like to avoid product tracking).
-
#3 Service – This is mainly use on Services. Example: Transportation, Rent and etc.
-
-
Unit of Measure - Please select correct UoM on first time before Save. *UoM will not allow to change once you have Save and perform transaction.
-
Sale Price - Your Product Selling price (This will appear in your Quotation, Sales Order, Customer Invoices).
-
Active – Default is “Checked”. Only if you would like to deactivate this product (Unchecked) and system will not show this product anymore.
-
EAN13 – mainly for Point of Sales System.
-
Internal Reference – 2 main functions
-
#1For Point of Sales not EAN13 code scanning.
-
#2For Product Reference (ex: A0232). Product will appear as: [A0232] Screw Driver.
-
-
Description field: It is for additional internal notes.
-
Step 3
-
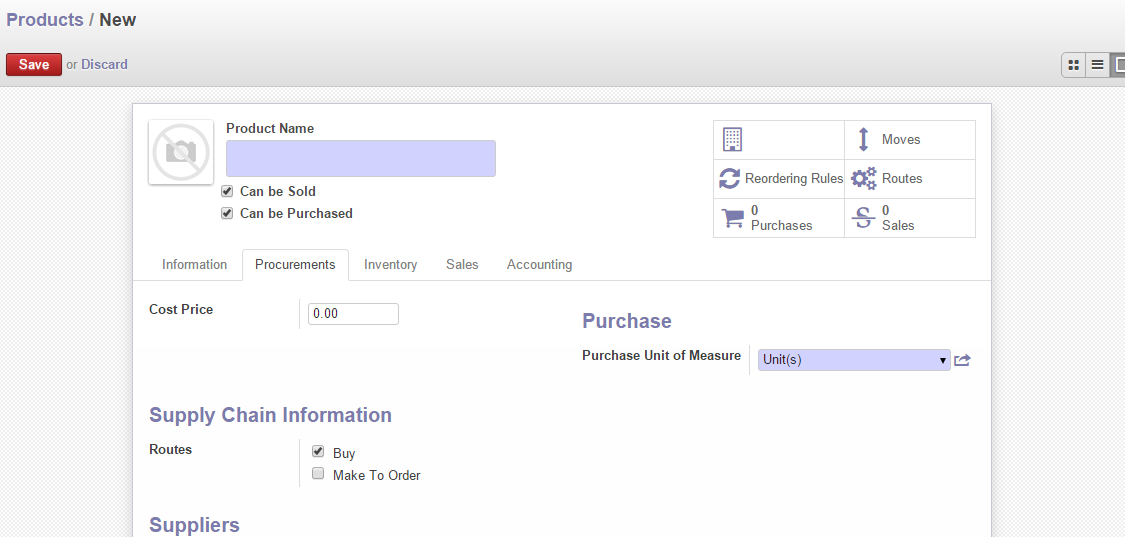
Under Procurements Tab
-
Cost Price – Your product Purchase price (this will appear in your RFQ, Purchase Order, Supplier Invoices).
-
Supply Chain Information – Default Routes set to “Buy” and “Make to Order” is associate link with Manufacturing.
-
Step 4
-
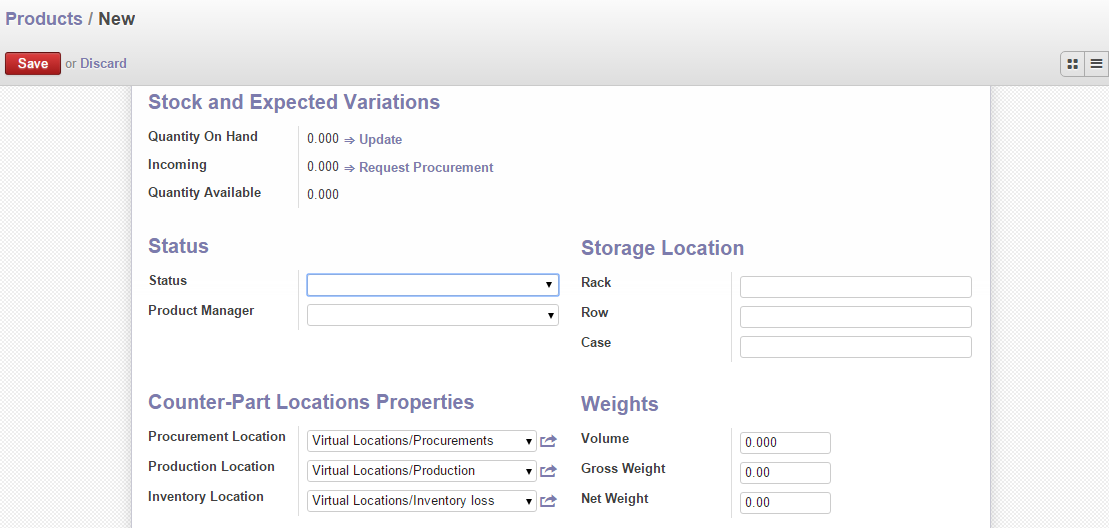
Under Inventory Tab
-
Quantity on Hand – update product qty here (aka: manual adjustment update).
-
Other field are related to Storage location which for internal tracking purposes.
-
Step 5
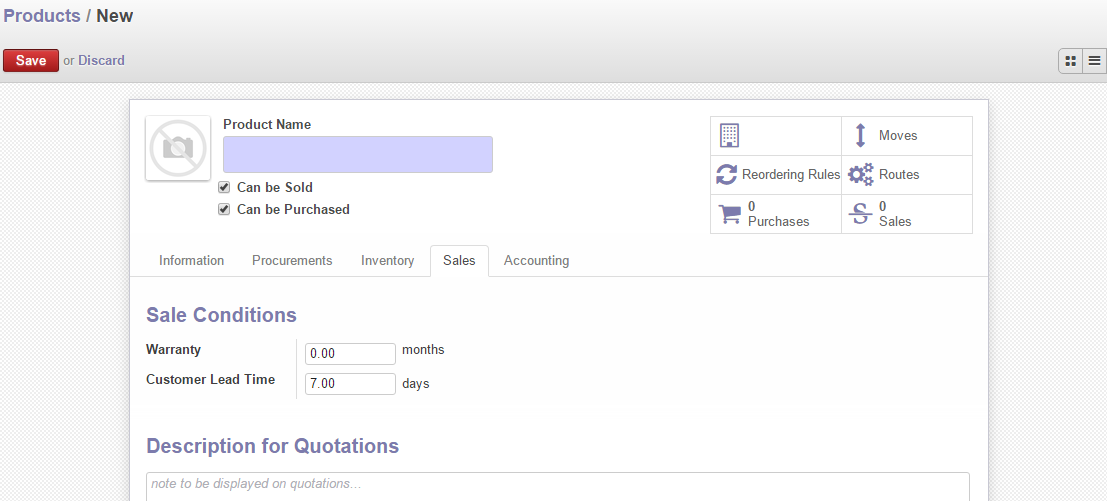
-
Under Sales Tab
- Warranty and Lead time – 0 month and 7 days (Default).

Step 6
-
Under Accounting Tab (consulting your accountant for Account entry)
-
Internal Category - All (Default).
-
Income Account - 410101 Sales (Default).
-
Expenses Account - 610501 General Expenses (Default).
-
Customer Taxes - SR (Default)
-
Once you set Tax code and Invoices/SO, it will auto populated Tax codes for this product.
-
-
Supplier Taxes - TX (Default)
-
Once you setTax code and Invoices/PO, it will auto populated Tax codes for this product.
-
-
-
Click
once you completed